It is a real shame to throw away classic pieces of furniture when they could be restored; in this blog we share how to restore a 100 year old chair making it a brilliant addition to any interior once again.
At the start of the project the chair had a shabby faded red seat and appeared to be English Victorian. It was in poor condition with the underneath of the fabric rotten and the woodwork scratched and damaged.
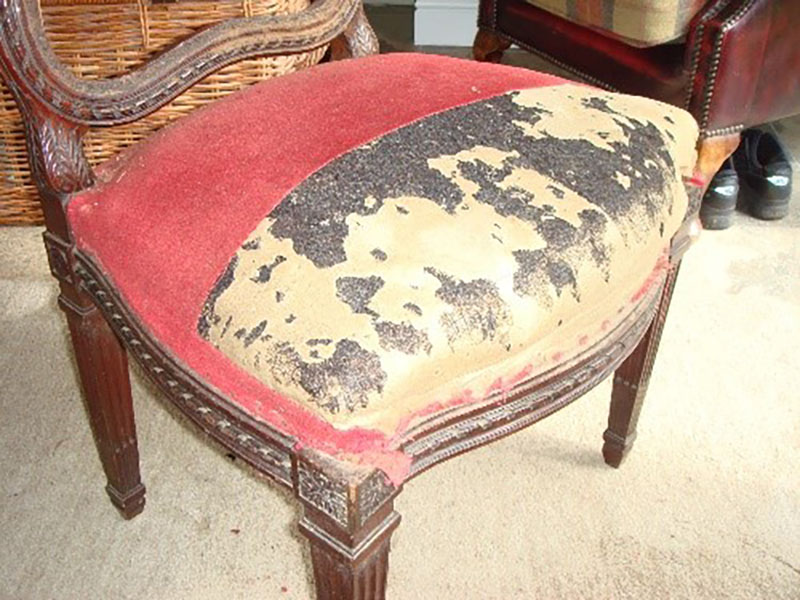
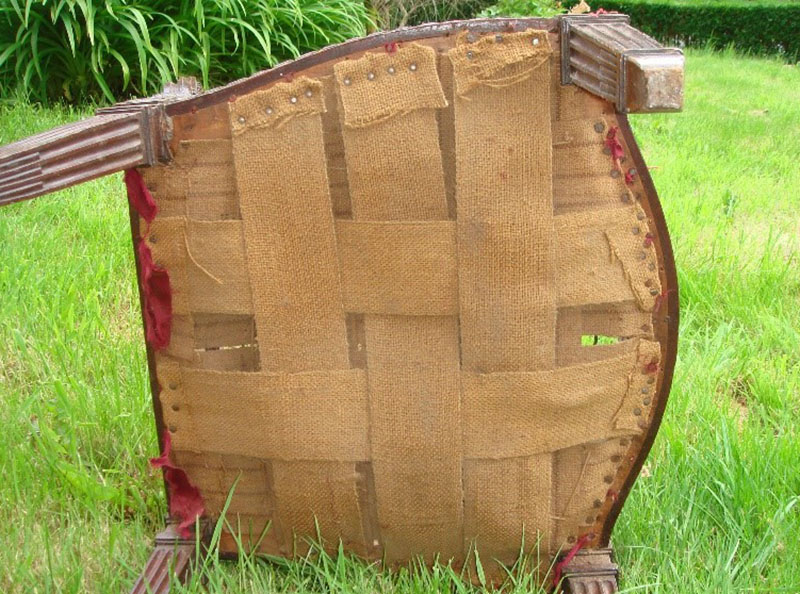
On inspection, the original upholstery was discovered and it was established that the chair was in fact French. Although it had not been reupholstered before, an attempt had been made at some point to repair the webbing (shown in the photo).
The Restoration
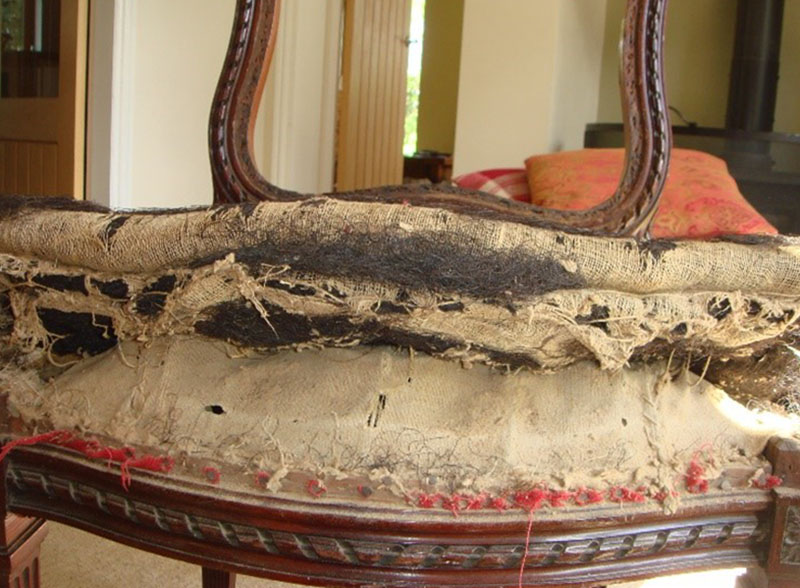
Step 1 – Stripping the upholstery and preparing the woodwork.
It took half a day to strip the existing upholstery, before moving on to apply a coat of pale blue chalk paint. Once dry, this was then rubbed back to reveal a shabby chic look.
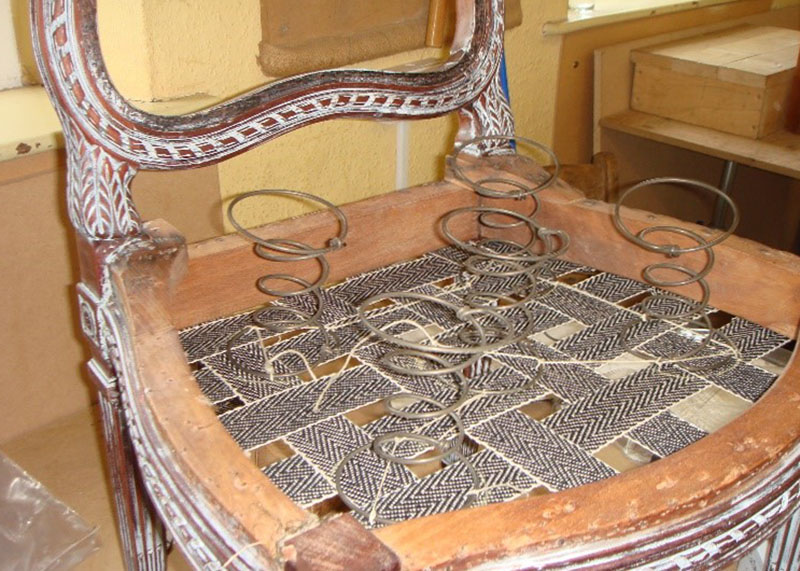
Step 2 – Fixing the chair springs.
The chair springs were tested for re-use by pushing down on the outside edge; the spring’s top edge should not compress over the next ring and should not be soft or compress at an angle. Unfortunately the springs lacked resistance, so 9 new 4”10 gauge springs were fitted (5 springs is the convention for a standard dining chair, using more springs will make the chair more comfortable).
Starting with the webbing (using a strong herring bow) the middle point was worked out, and the webbing secured leaving about an inch from the outside edge of the chair. The springs were then tied to the webbing in 3 places, making sure that the join on spring was pointing inwards. These were held in place using a slipknot to start with and once they were all in place, a 16mm tack was knocked into the outside edge of the chair in line with centre of each spring (not to driven it in all the way yet). The springs were then tied from the second ring down (outside edge) across to the next spring’s top ring before securing to the tack on the outside edge.
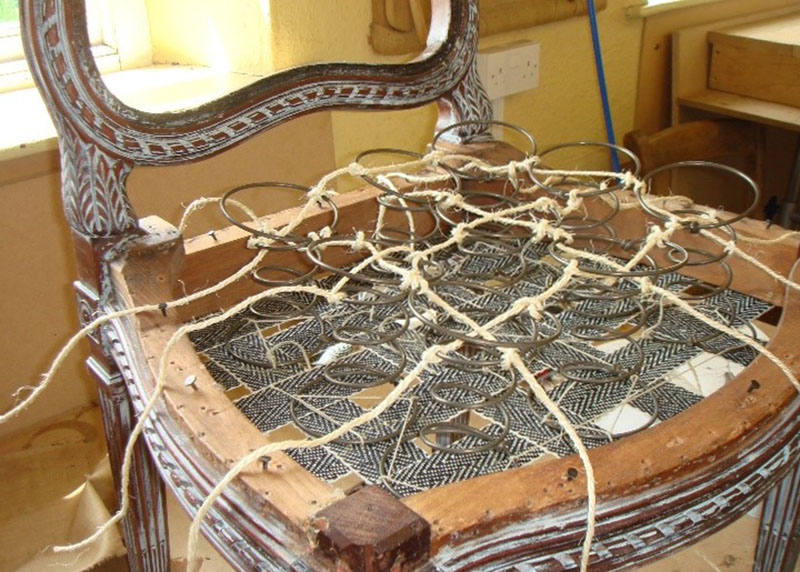 (Pictured before tied to tacks and secured tightly)
Springs were then checked to make sure they were level and straight (a flat piece of wood was pushed down on to the springs to check this) and pulled tight. Tacks were then driven all the way in to the outside edge of the chair securing the springs firmly in place.
Step 3 – Covering the springs.
Spring tarpaulin was used to cover the spring base. Using tacks, starting at the middle point, the tarpauling was pulled across the base. It was then folded over and secured all around the edge with additional tacks.
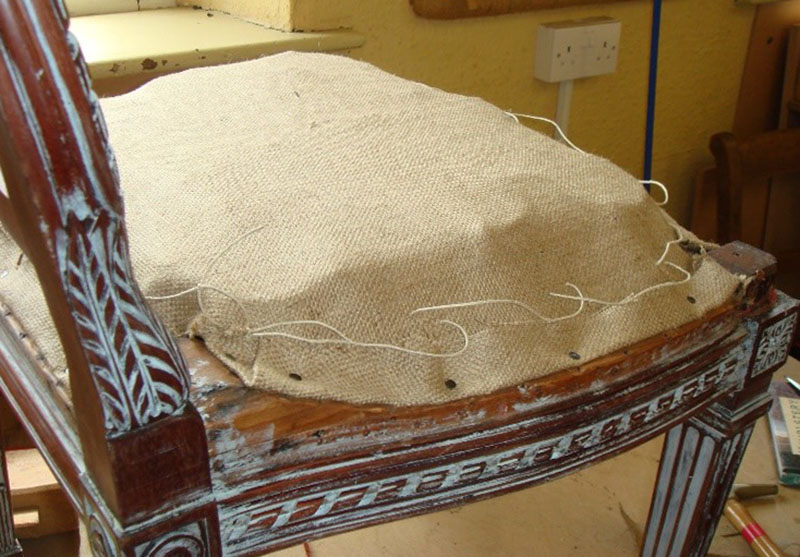
Next, starting at the left side, large loops were made for a Coir edge (horse hair can also be used). The black Coir was rolled into tight balls to fit under these loops protecting the springs around the edge.

Once the edge was complete, more shallow loops were made across the middle of the chair to hold flat cow pat size balls of Coir. These were made slightly proud to give the middle shape. The loops where then made as tight as possible to secure in the Coir.
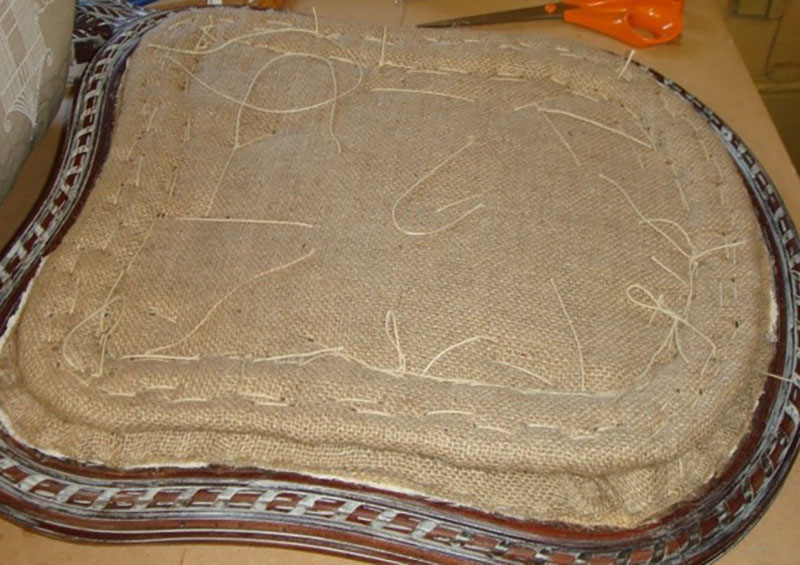
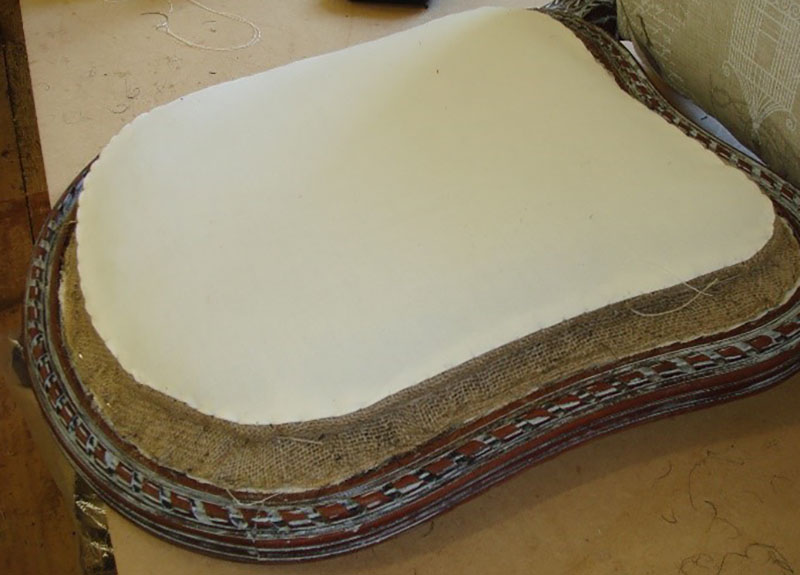
A good quality linen was then used to cover this. The edges were rolled tightly under and the linen scrim secured on the chamfered edge using 10mm tacks starting from the middle and working outwards as with the tarpaulin.
The linen was then stitched, through the seat bottom and back up to the top in a zigzag shape. Regulate when finished to ensure a flat and even shape (picture shows regulators).
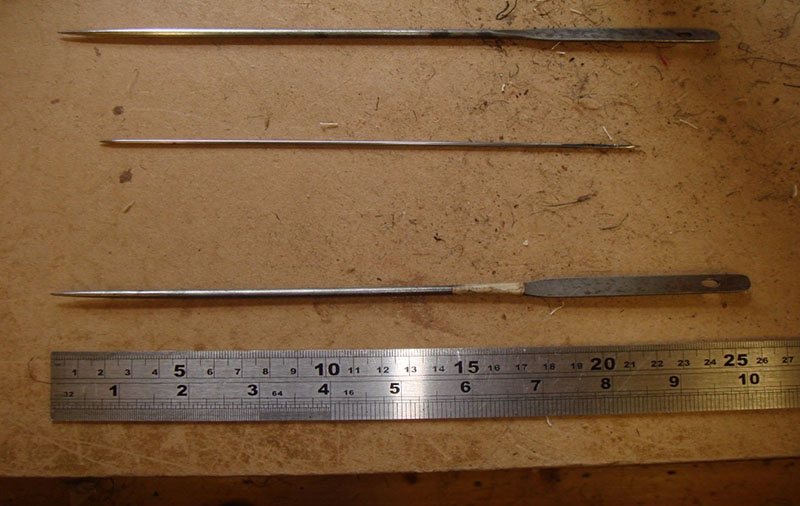
Next, a blind stich was made just above the tack line all around the chair (picture shows size of needle needed for blind stitching).
The blind stich was started on the left hand side and spaced approximately 3 cm apart. The needle was inserted straight then brought back up at an angle, ensuring not to bring the needle all the way out at the top. To lock the stich, the needle was put back in half way between the last stich and wrapped around the needle 3 times from the left side twine and pulled tight to the left then back to the right.
Marks were then made around chair for the top crust edge. Another blind stich was made all around the chair to make a sausage shape structure, regulating as required. The same stich was made all around the chair again, this time pulling the needle all the way through at the top flattening the sausage shape. A weight was then left on the chair overnight; on removing this, the twine in middle of chair was tightened.
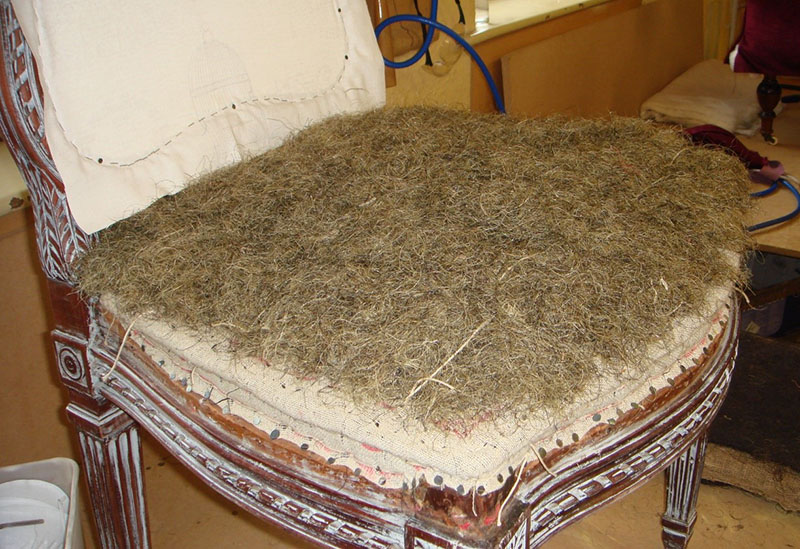
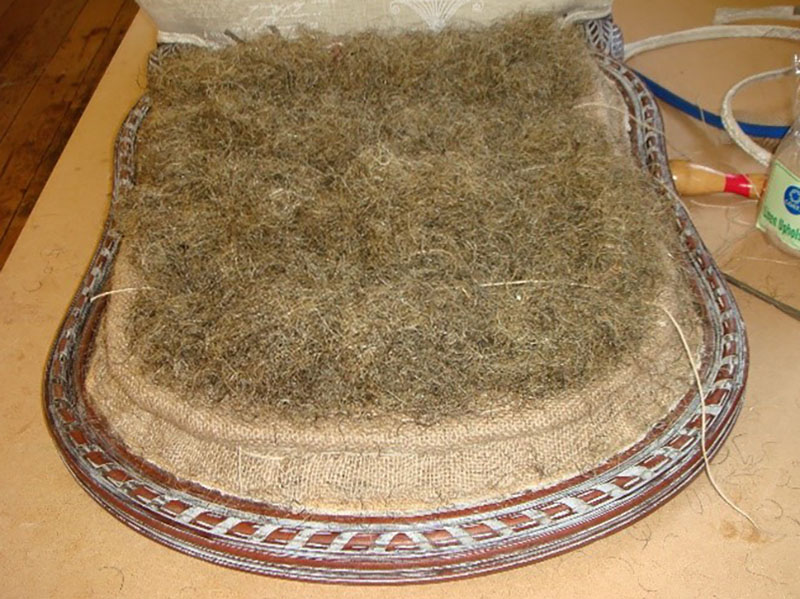
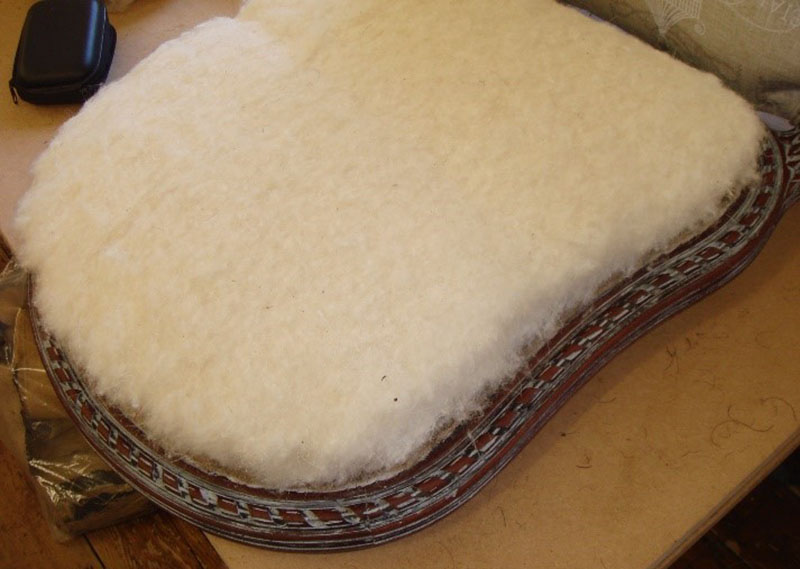
Step 4 – Padding the seat.
3 lines of shallow loops were made on the chair seat and were filled with pig hair. They were then teased out to cover the string/twine before tightening the loops.
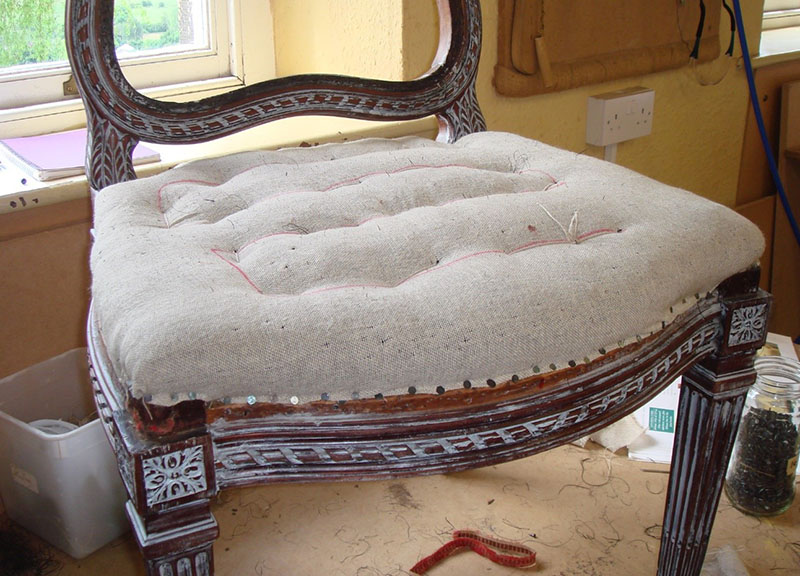
Bulk wadding was then placed over the hair and pulled to size (on this occasion it went over edge of chair because the material used is not heavy duty).
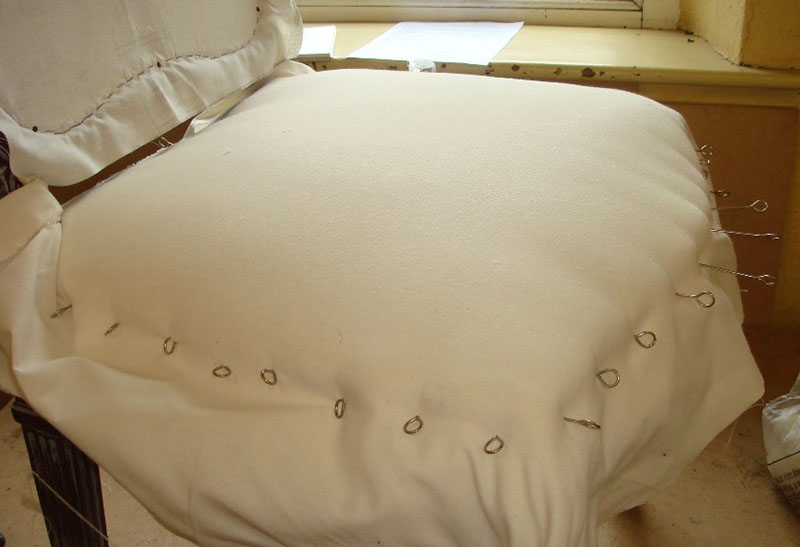
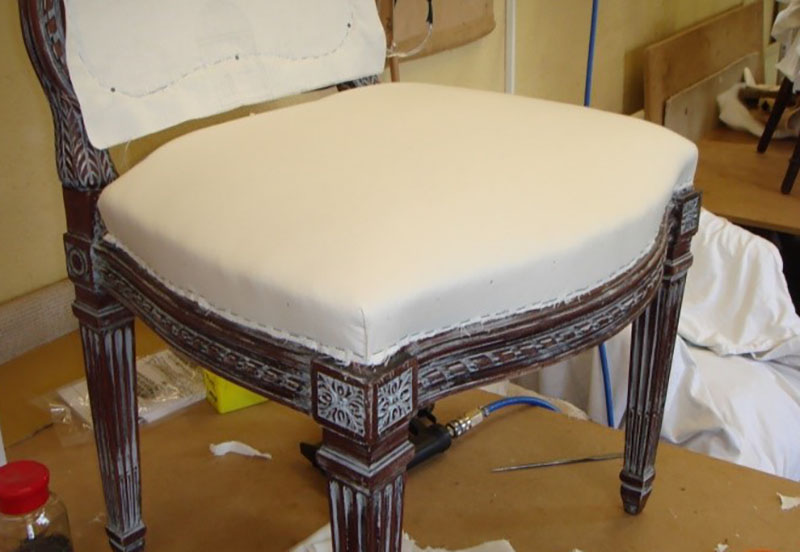
Calico was then placed over the top and skewered tightly in place. It was pulled tightly starting from the middles and working out to the corners. Any overlapping bulk wadding was pulled out and the calico was stapled in place.
Step 5 – Padding the back of the chair cushion.
The back of chair’s padding was refurbished using 10oz Hessian which is flexible with a more open weave. This was stitched in centre, using a curved needle to hold it to the back of the chair. It was then secured around outer edge and the hessian was folded inwards.
A locking stich was used from the outside edge, all around the padding. Two more lines of stitching were then used around the outside of the shape to flatten out the edge regulating as it went around the outside.
The back was then middle looped and filled with pig hair as was done with the seat. However, calico was stitched on top before bulk wadding this time and to upper edge as the fixing area was too narrow.
Step 6 – The back of the chair.
The material for the back of chair was secured with staples before being covered with 12oz hessian (firm weave) used to give support to back of chair. A thin layer of skim wadding when then placed and stapled over the top and secured with the top cover.
Step 7 – Covering the chair.
The chair was then covered with the final material, using staples to secure along the edges, this was then finished with double piping, applied using hot glue to conceal stapled edge.
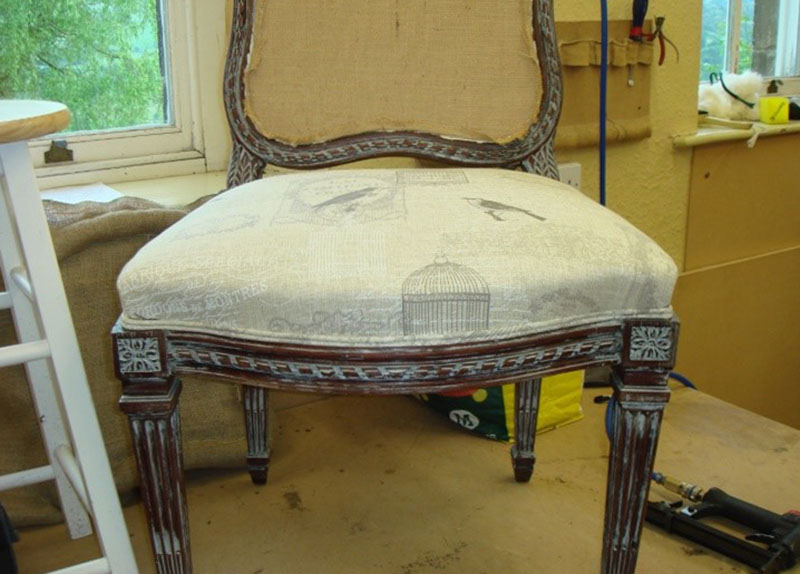
The Finished Chair.
 The finished chair.
Now that this beautiful chair had been restored, it would make a wonderful addition to either a modern or traditional setting.
We hope you enjoyed this blog, and it has inspired you to tackle a project of your own for a unique addition to your interiors.


4 responses
Nice Blog,Thanks For Sharing Information.
The greatest advantage of a Chair Upholstery is that they can fold up very easily for storage and they are extremely light. So whether or not you’re keeping it stored around the house, or you’re outside pushing it around, it will not be a burden to you. Thanks for the amazing article.
Very Nice Materials!
Beautiful work!